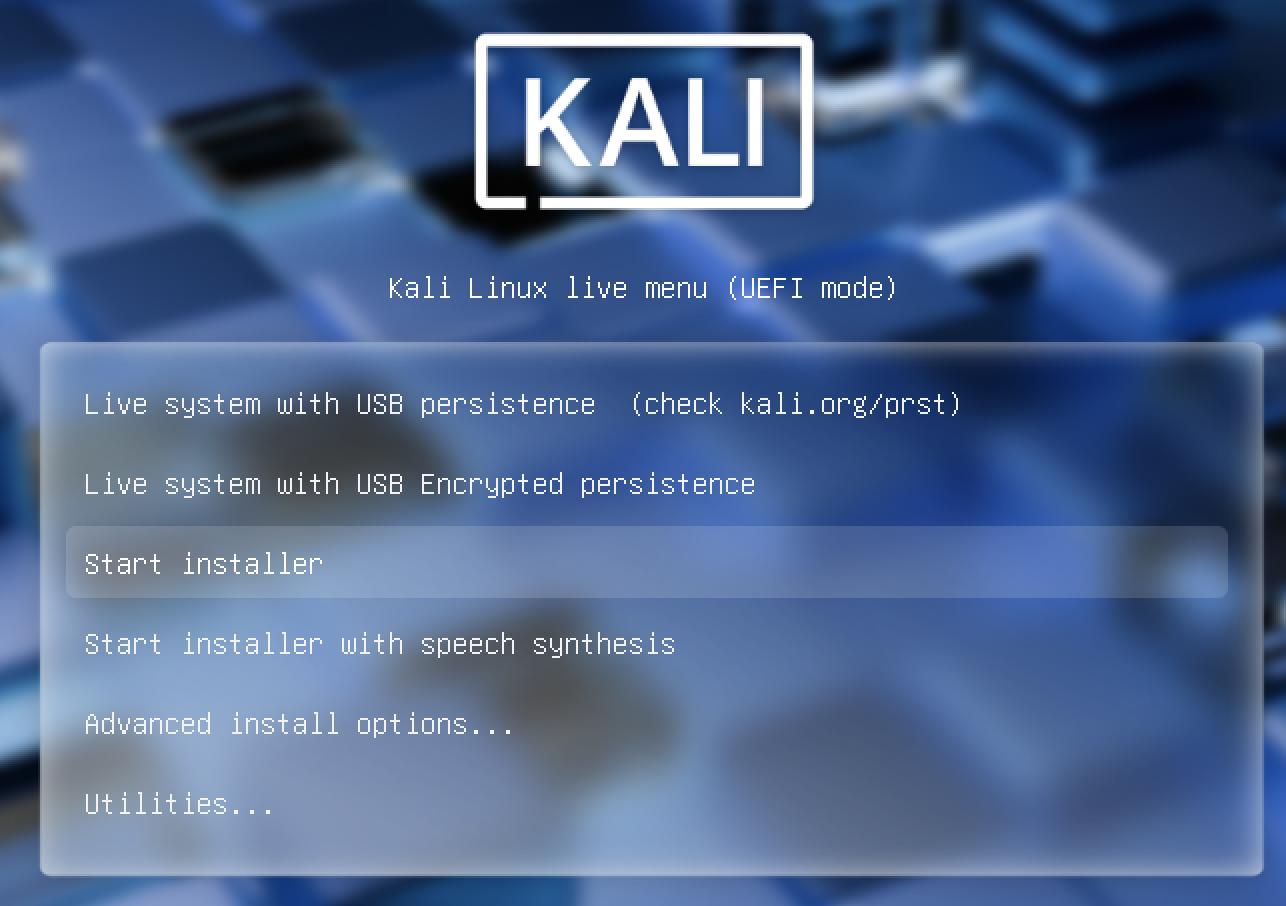
Step 1: Prepare your Mac for installation
- Download Kali Live ISO from the official Kali Linux Live ISO page or click this link to download.
-
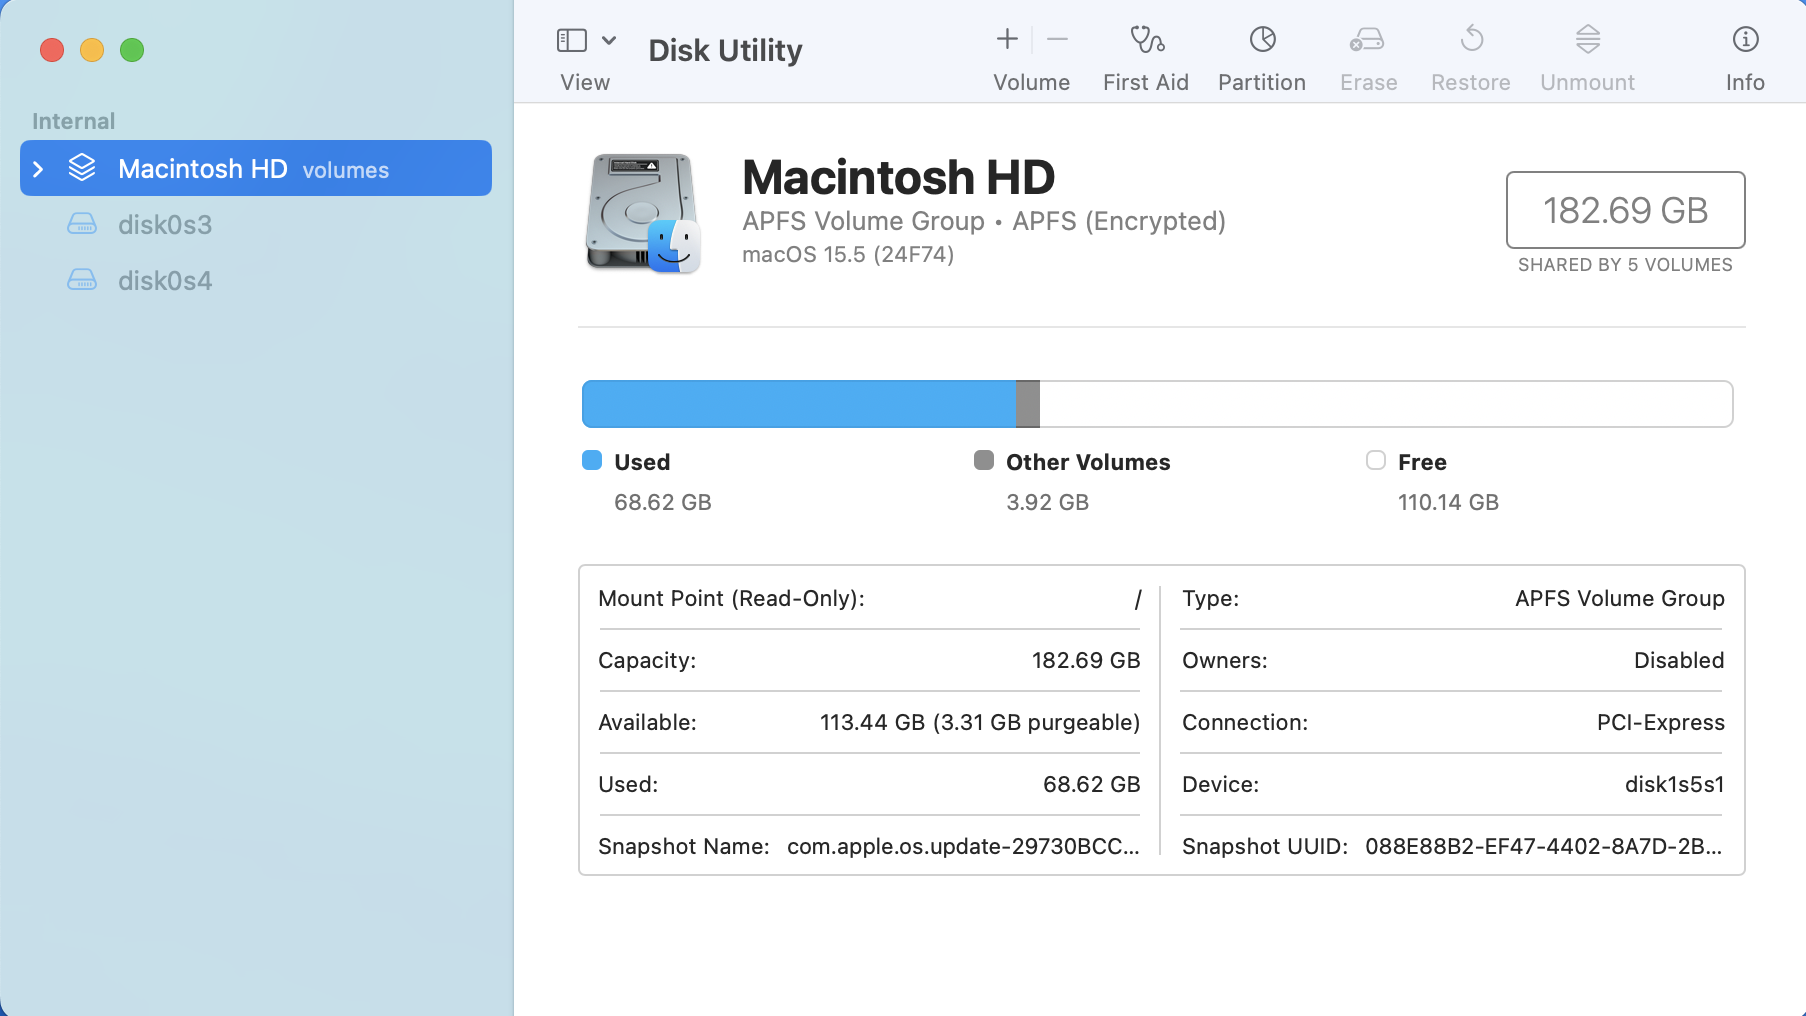
Open Disk Utility on macOS
-
Click on Partitions
-
Click on +
-
Click on Add Partition
-
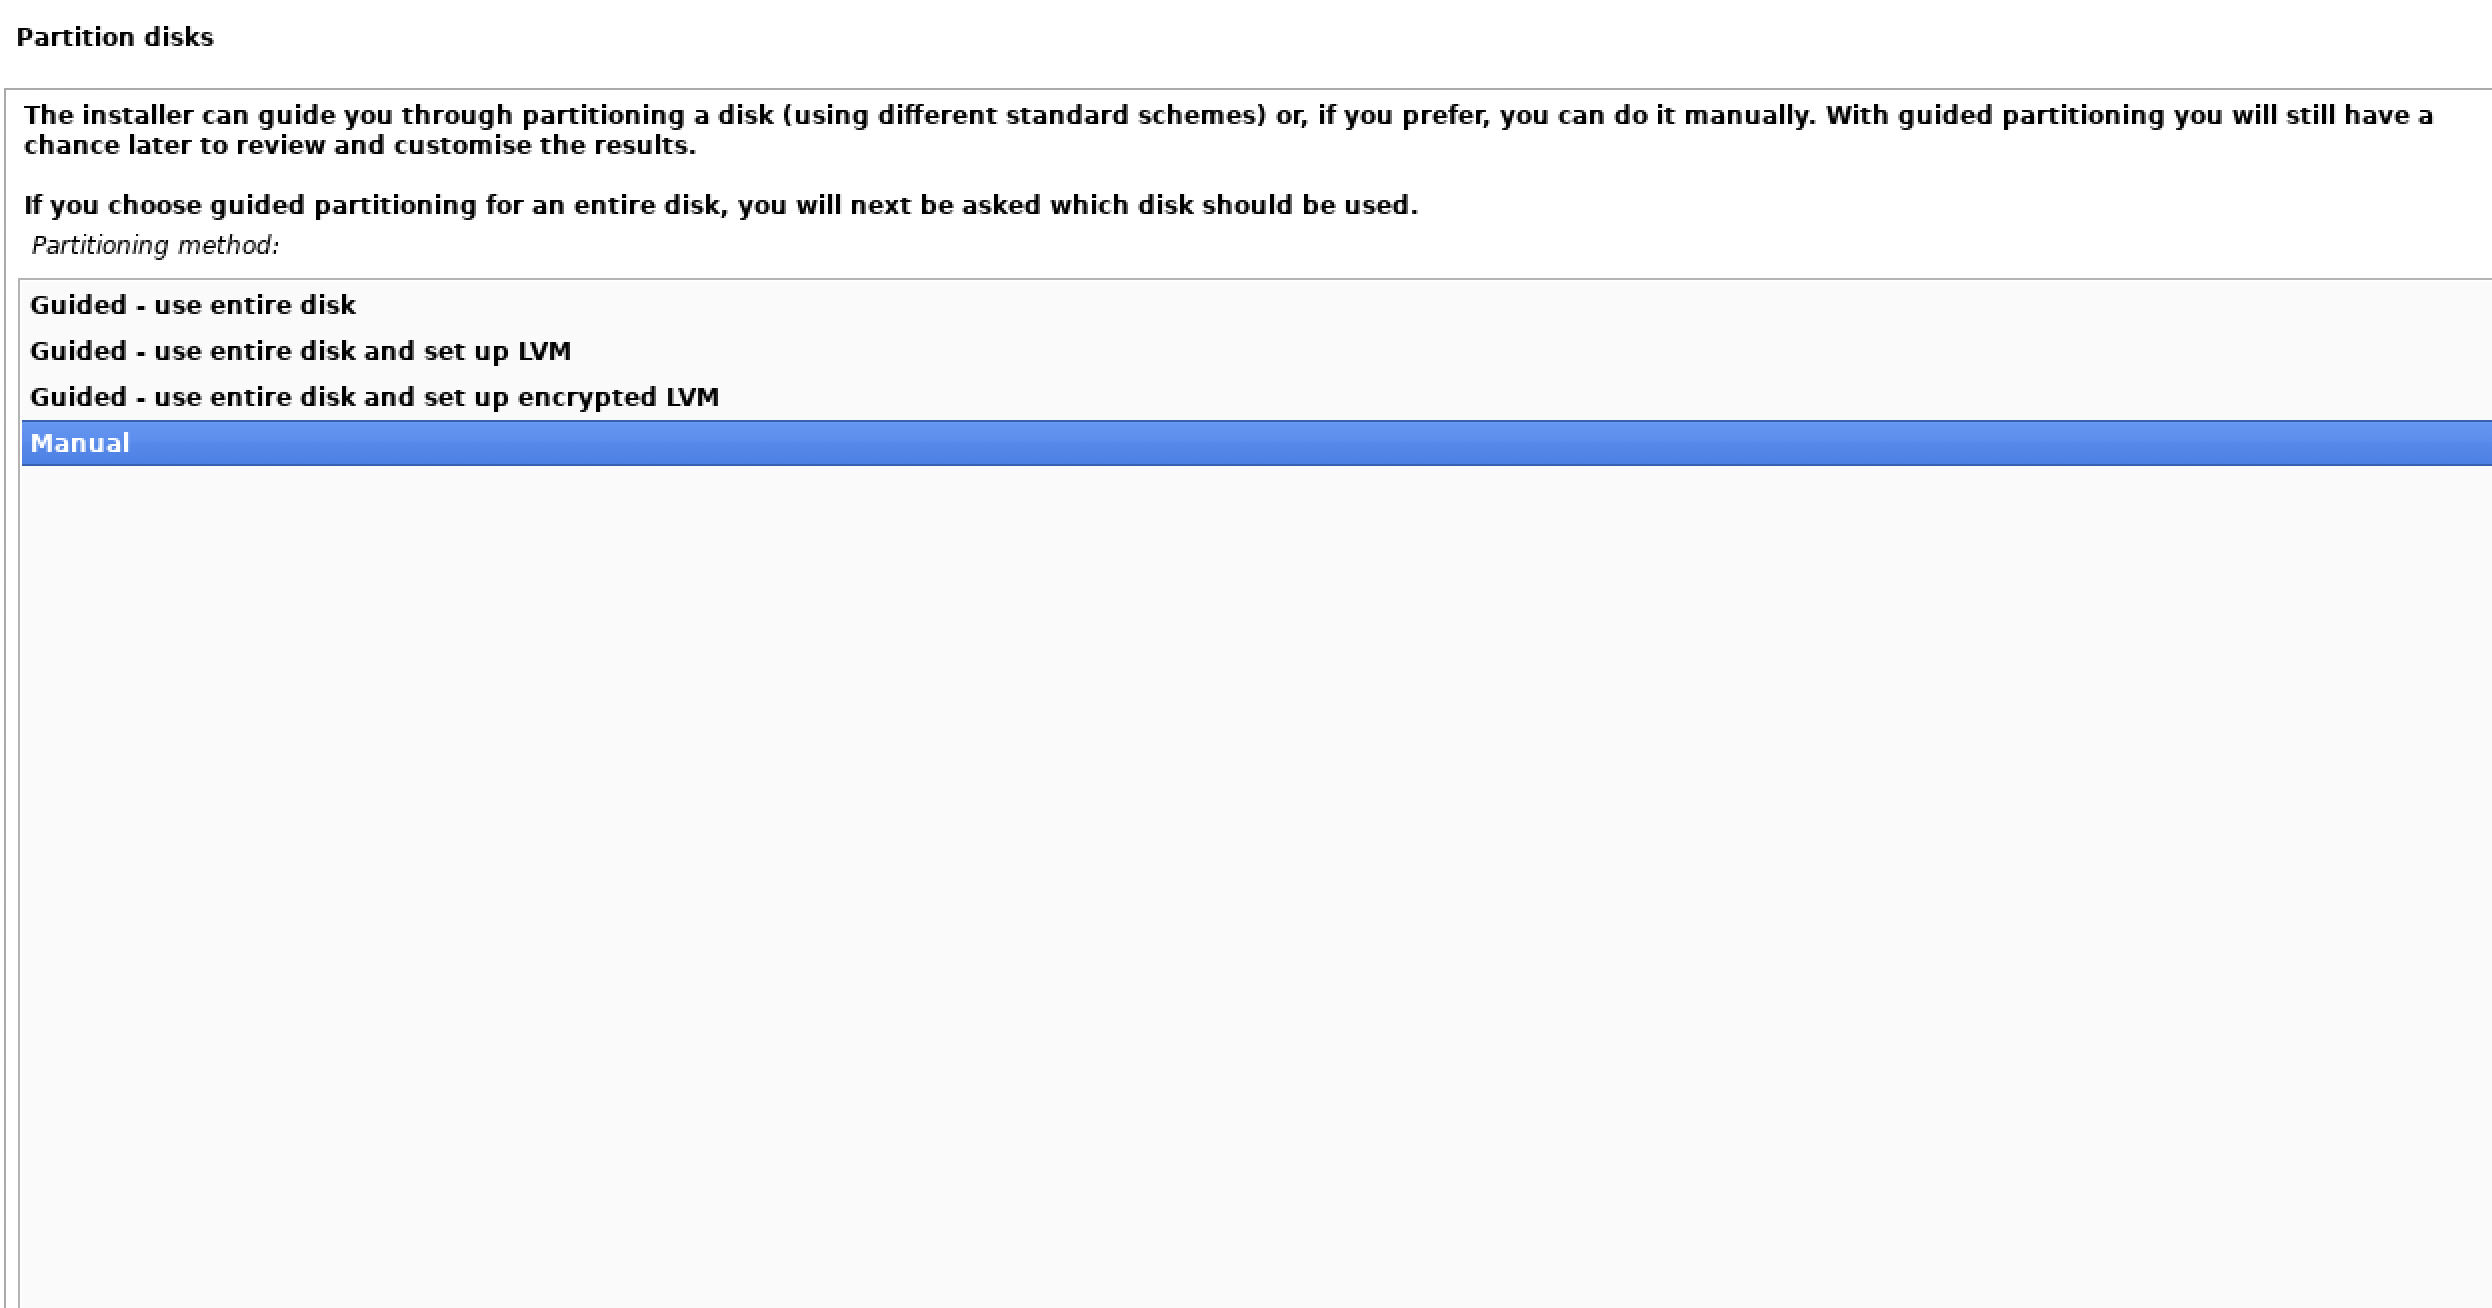
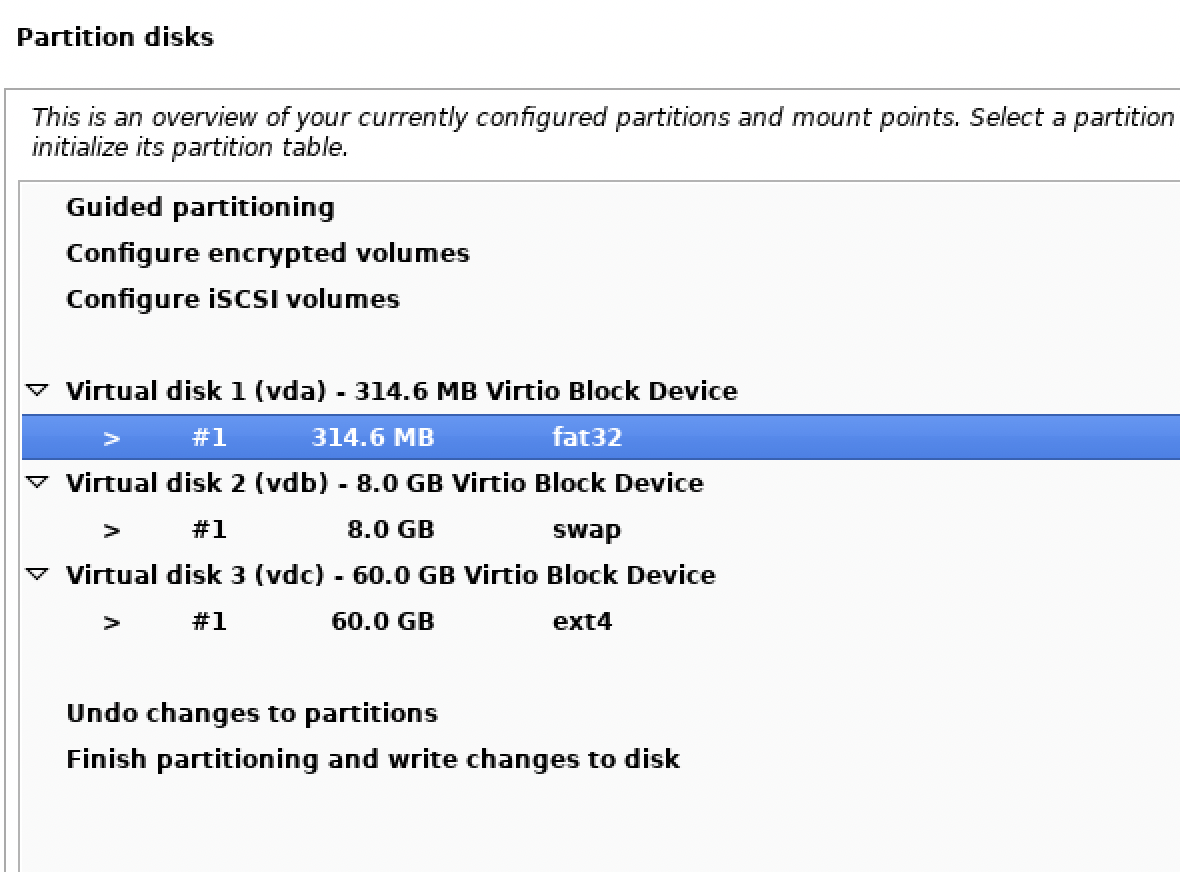
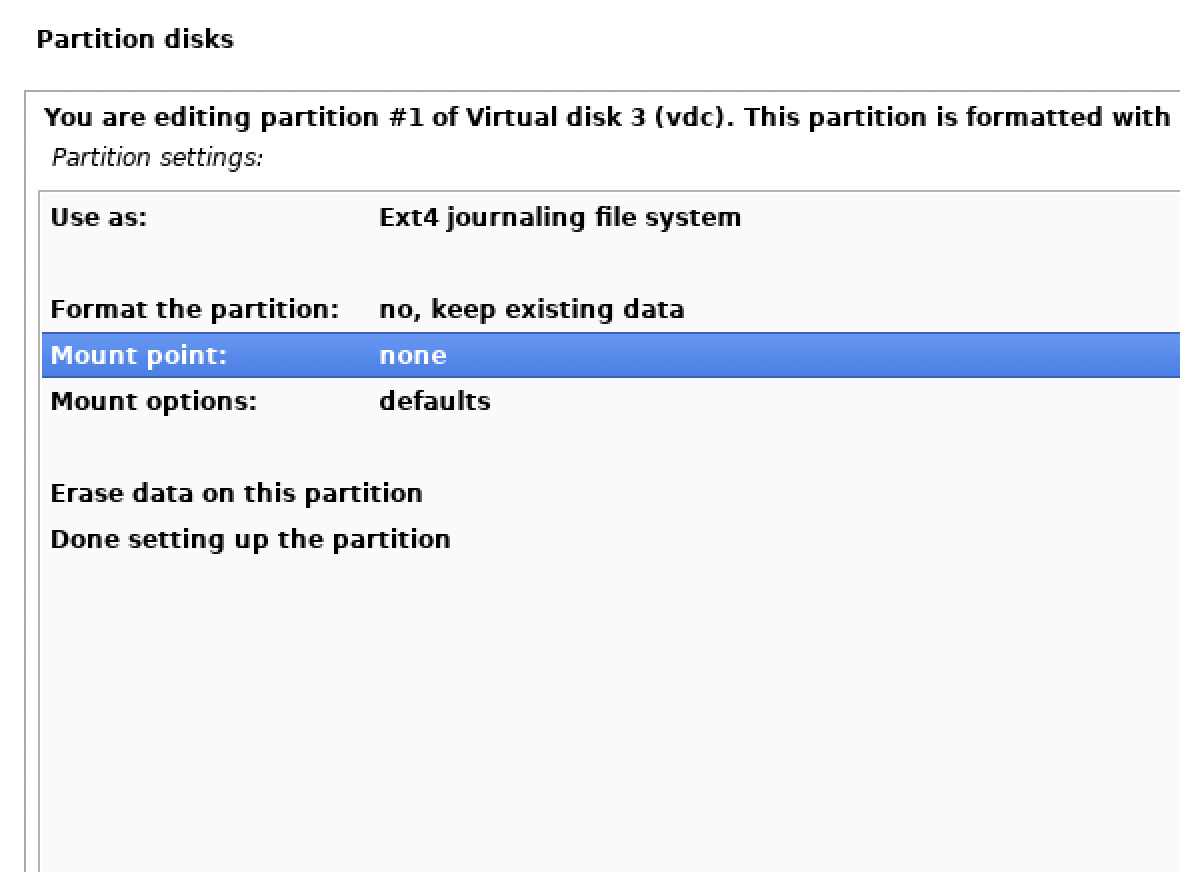
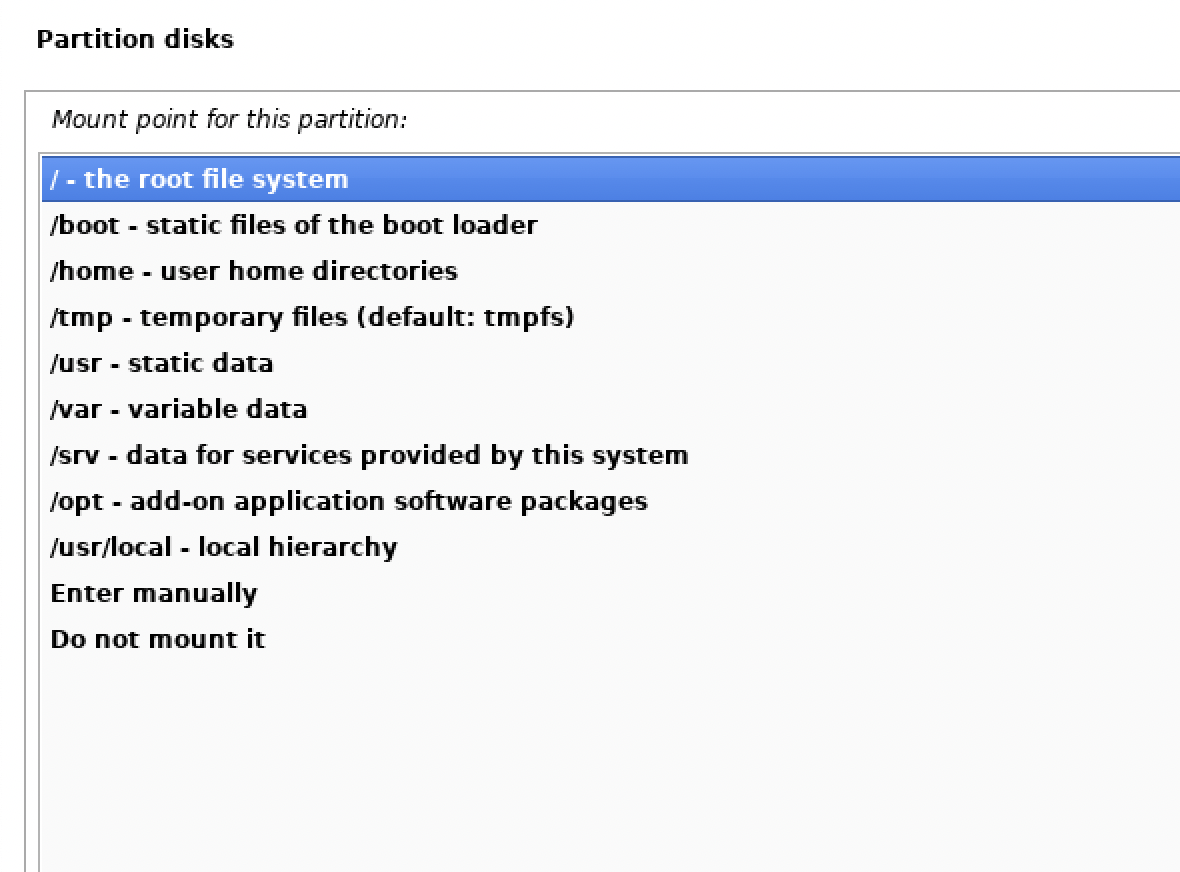
Partition the Disk:
-
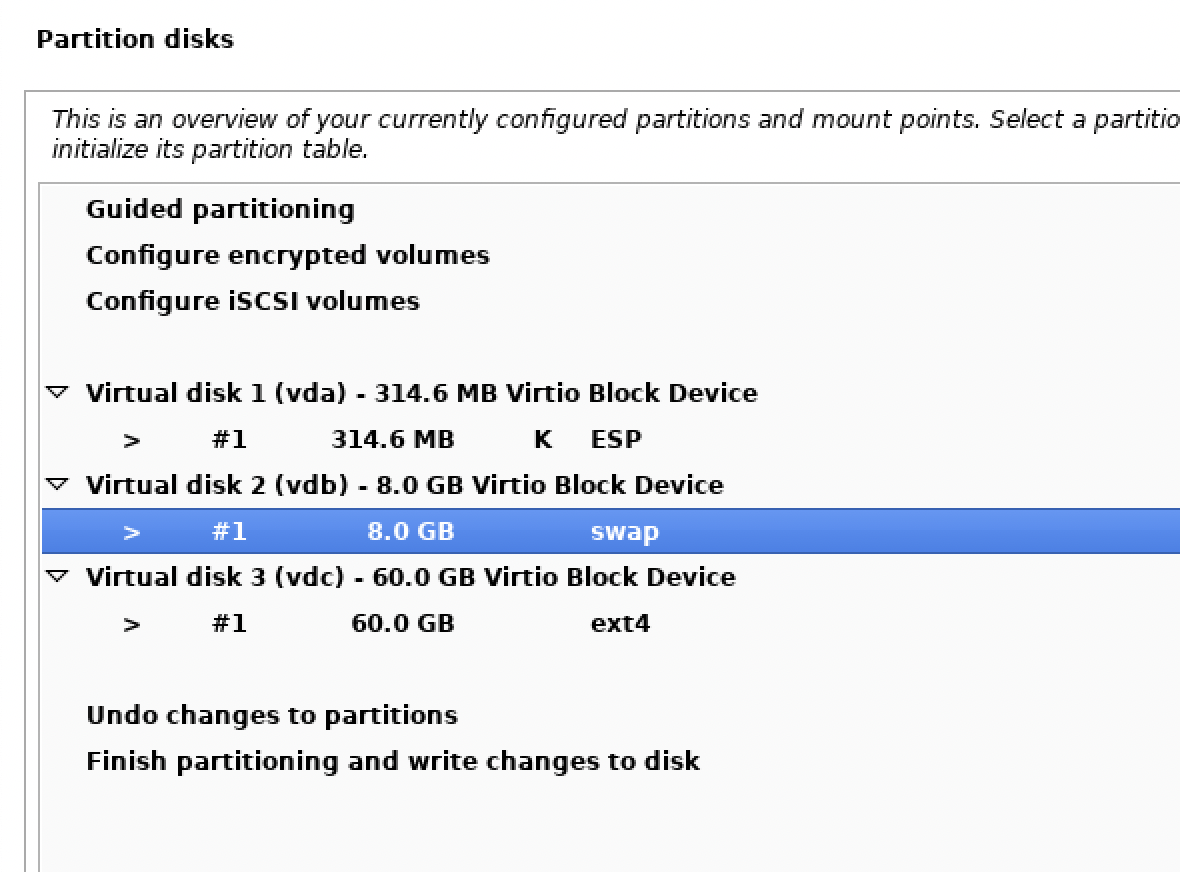
Root: Minimum 20 GB
-
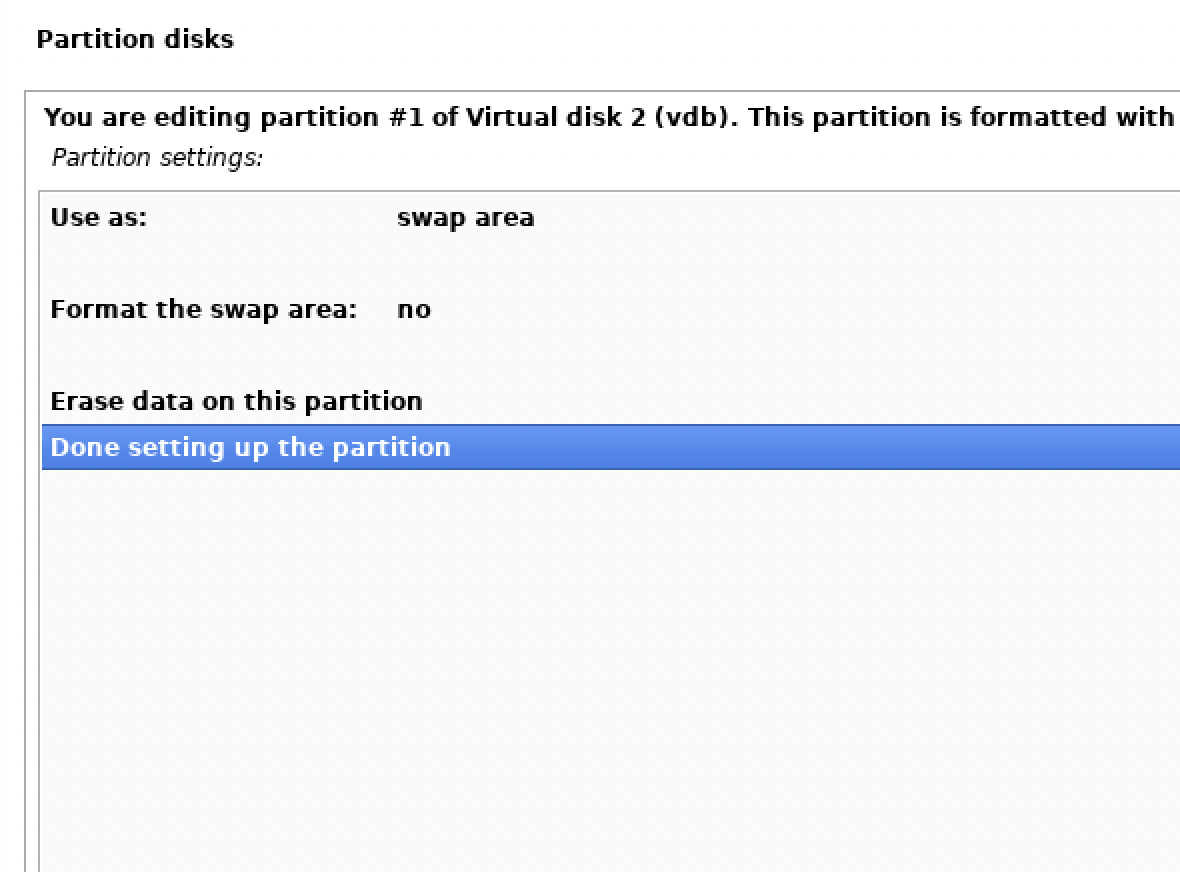
Swap: Minimum 4 GB
-
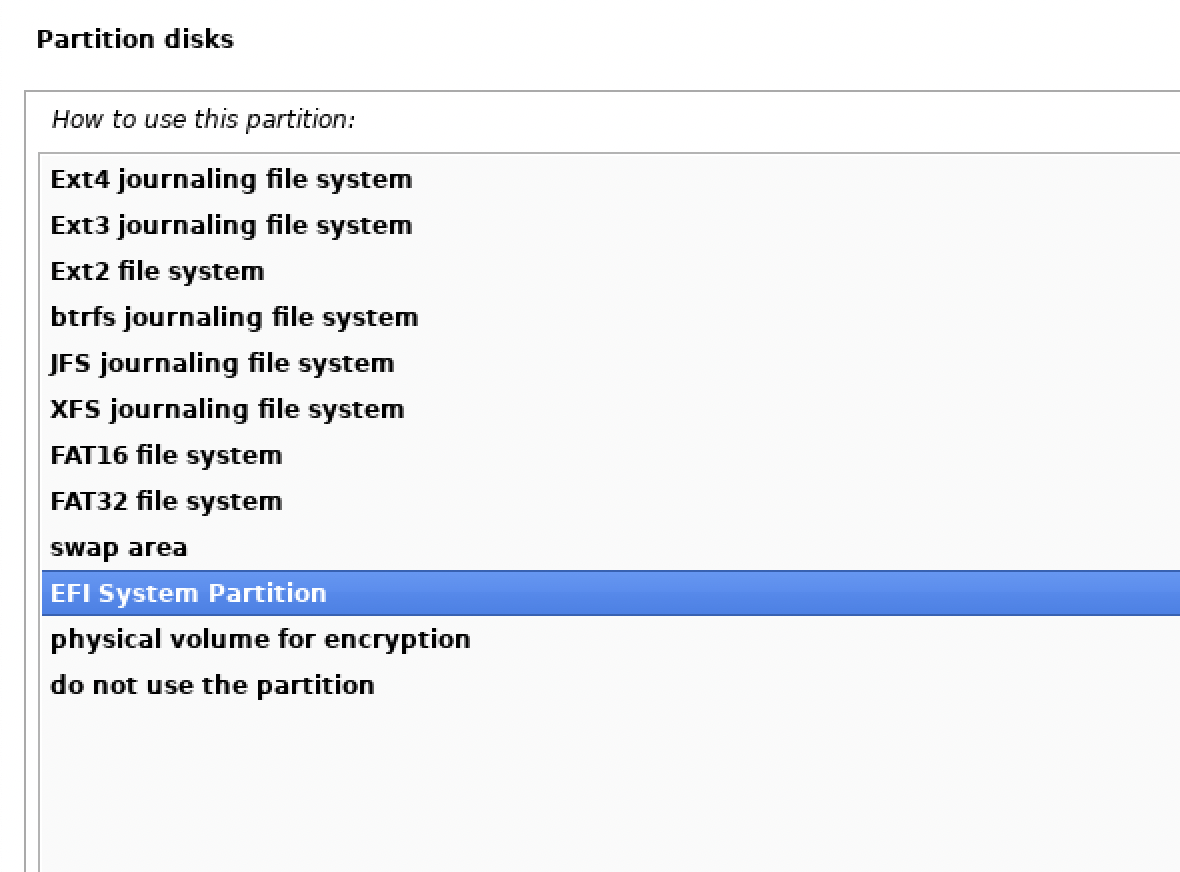
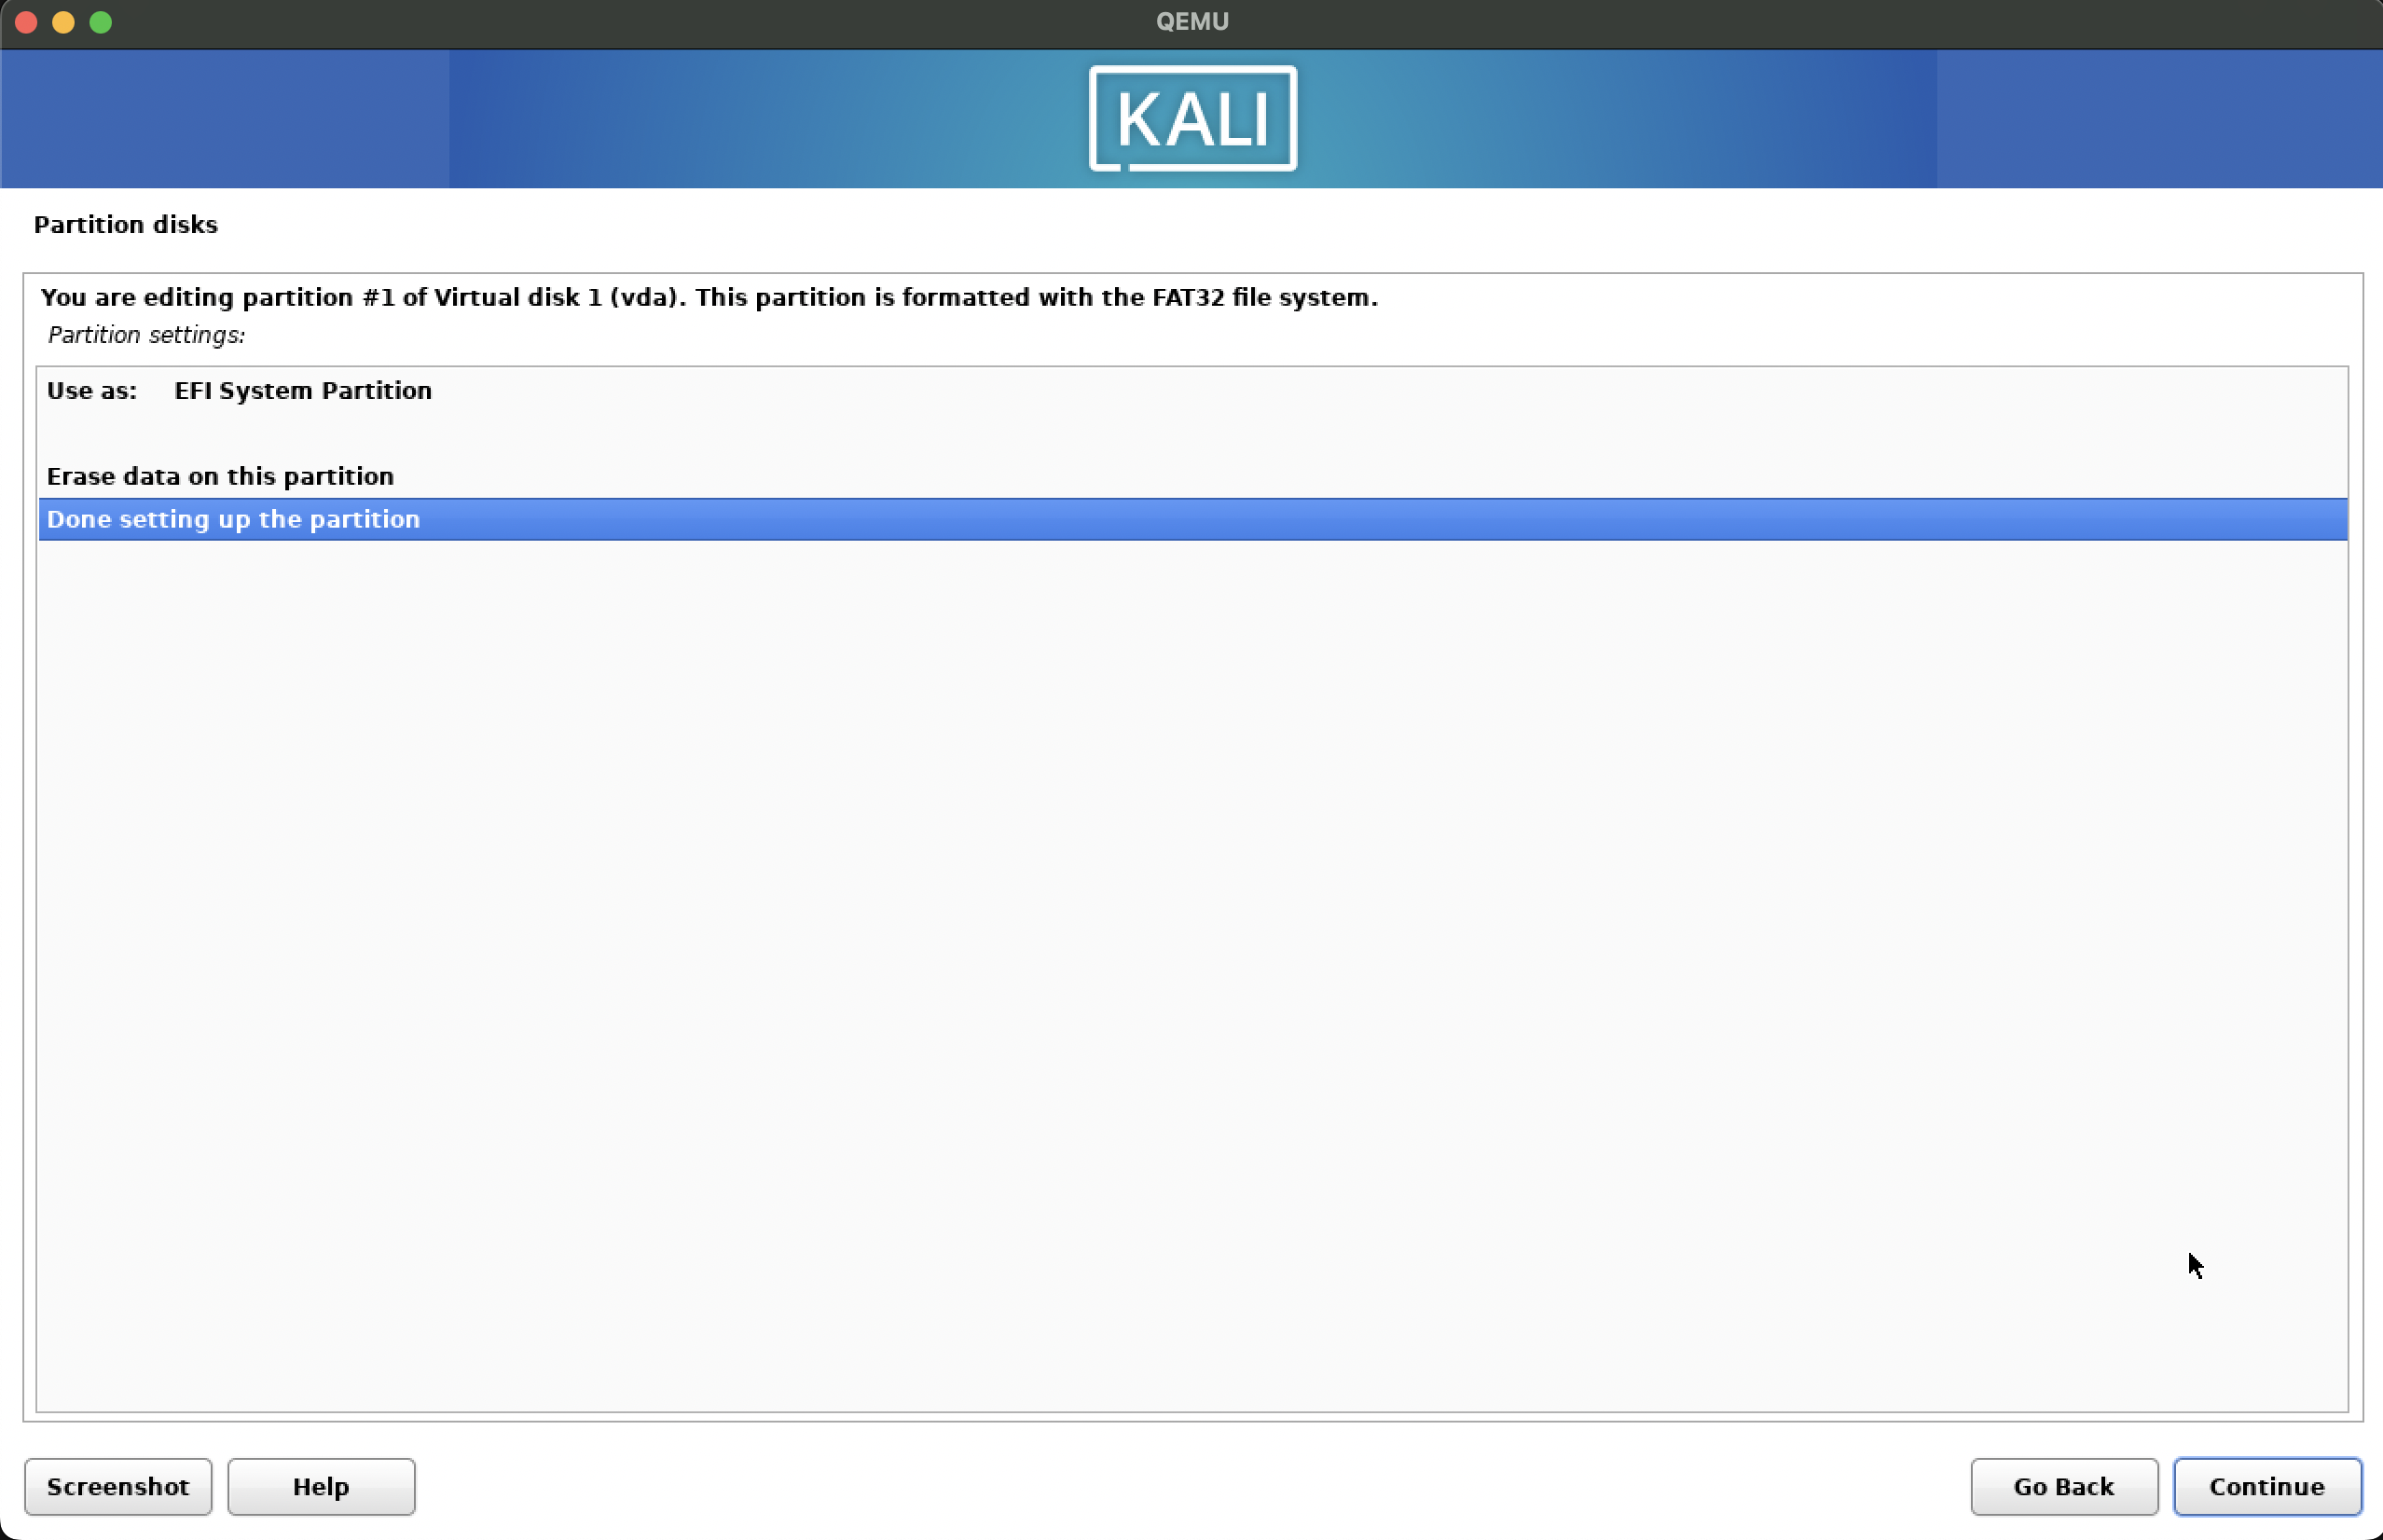
Boot (EFI): Minimum 500 MB (can be a separate or shared partition)
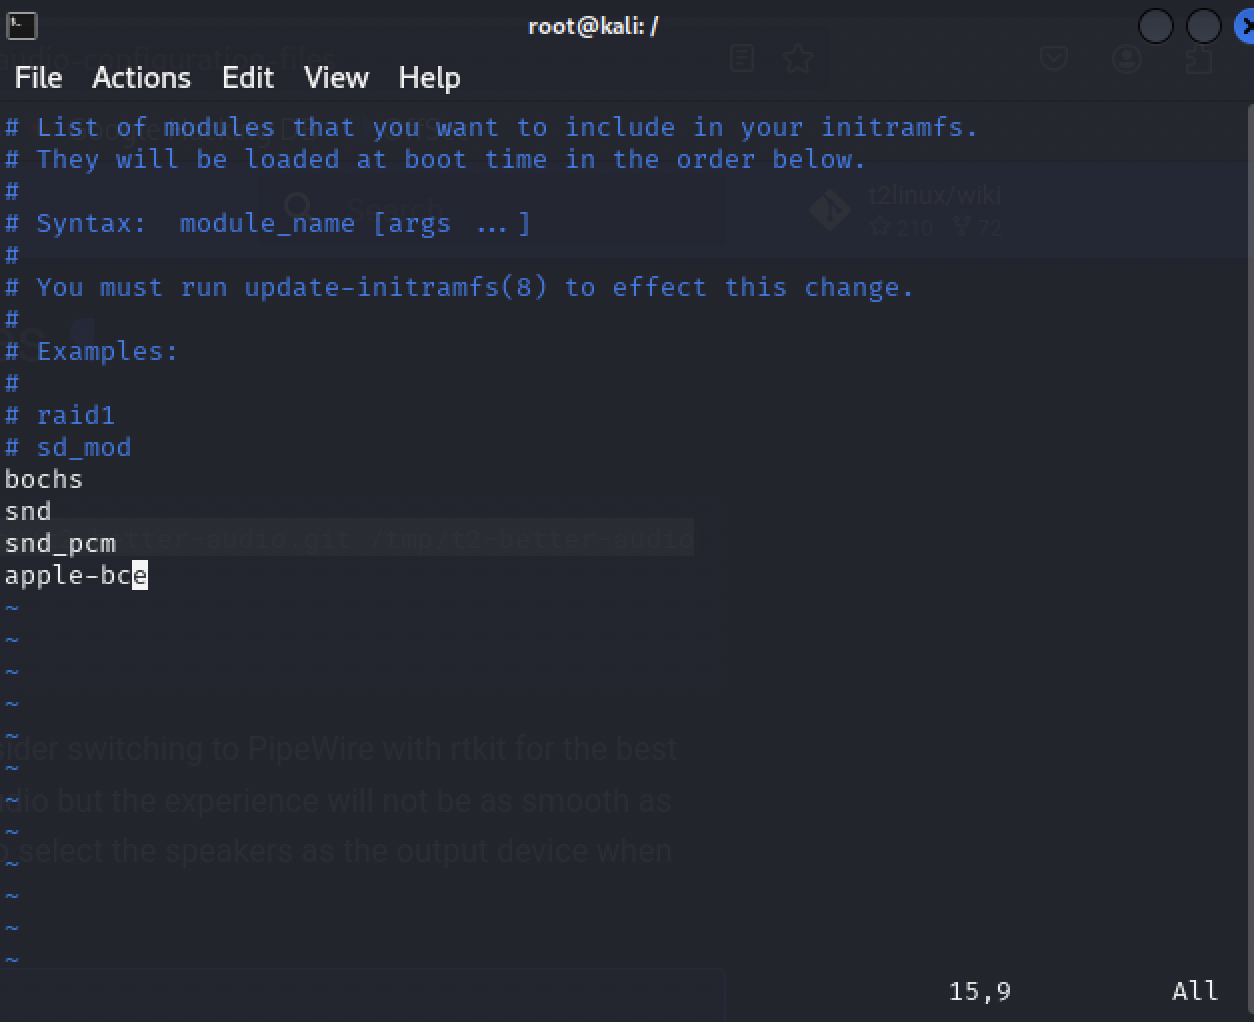
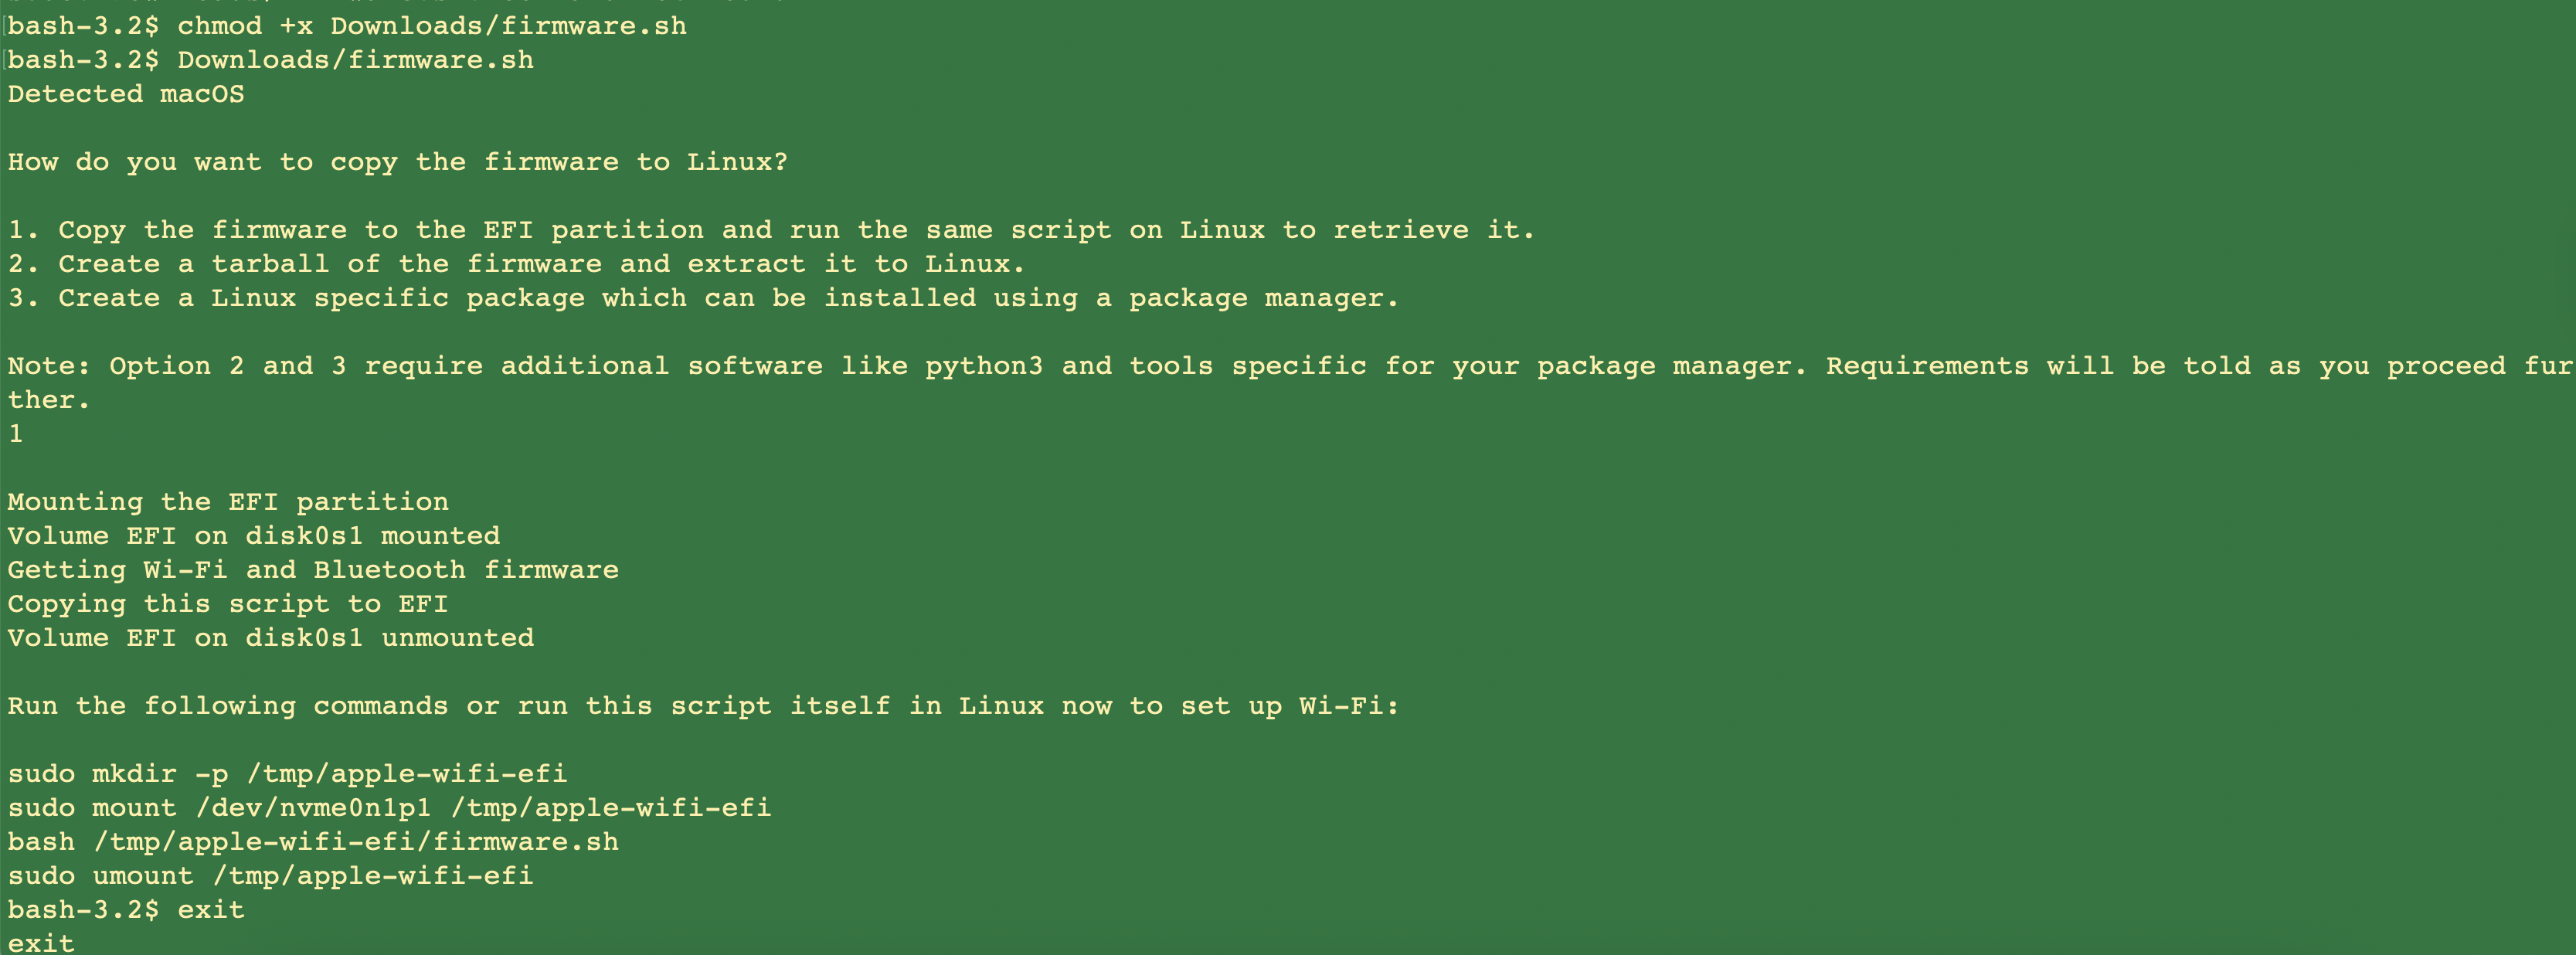
- Download WiFi and Bluetooth firmware.sh.
-
In macOS terminal run the following commands
bash chmod +x ~/Downloads/firmware.sh ~/Downloads/firmware.sh # Choose option 1 when prompted - Download and install QEMU for macOS from QEMU official site.
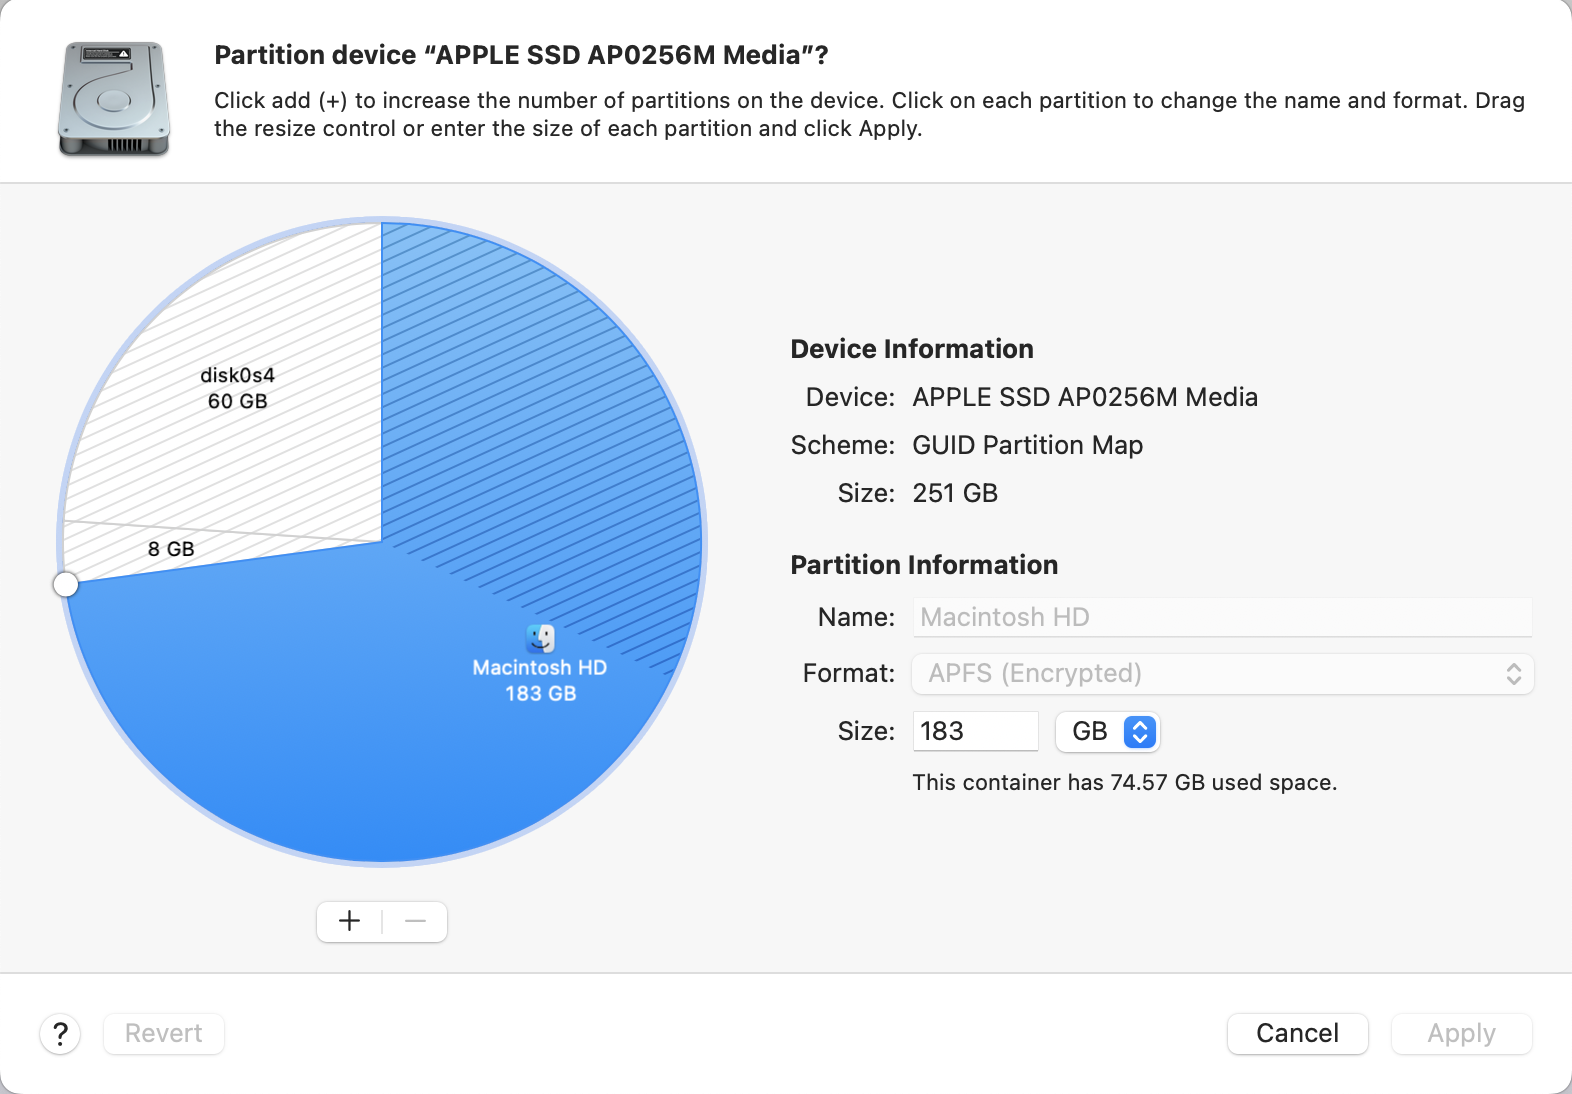
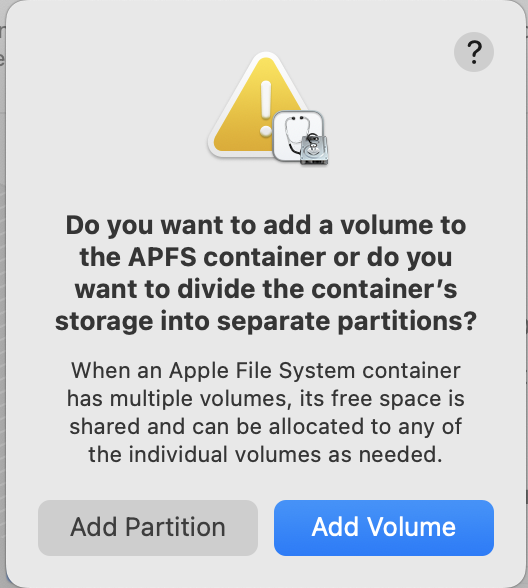
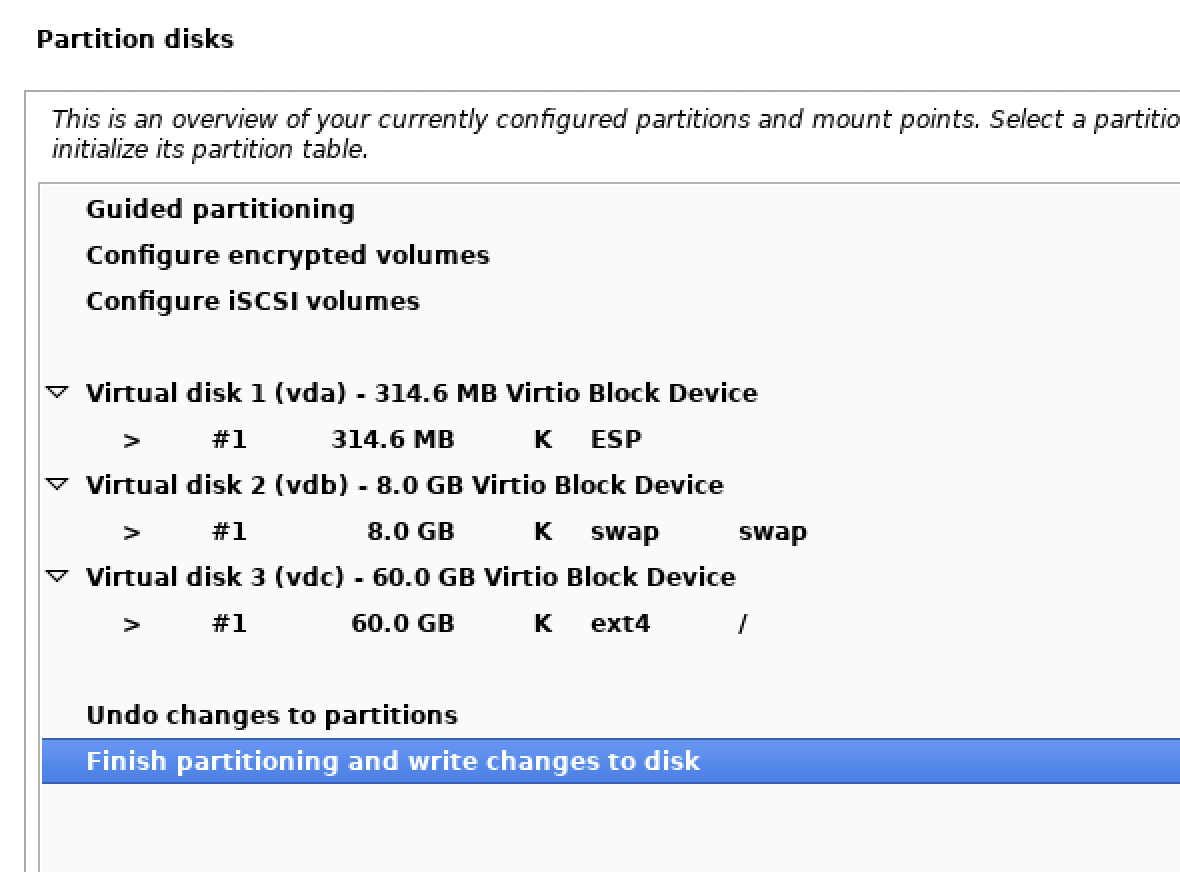
*** Click on Add Partition ***
*** If separate EFI partition format the partition using FAT system ***
 >
>